In Plain Light 06.17 – The Photoshop Basics Issue
Welcome to this month's newsletter!
In this issue:
You may want to rotate your phone in order to improve your browsing experience on this site.
It just happened that this issue became what it is. It appears while I am busy processing pictures from my last journey. You can call it a by-product, or a nifty mix of business with … another business
It isn't a manual, nor even a reference. Its intention is to show how I work. Its subject is my workflow, in my workplace.
If you are curious, come and join me for a while!
Photoshop basics
With almost 30 years of market presence under its belt, Photoshop is one of the most popular and powerful image editing software packages.
From the beginning, it has become the tool of choice for many professional photographers. If I were to name the reasons, then it would be for its data model and flexibility with regard to different workflows.
Layer cake
The image manipulation tools available in the package are pretty much the same as with many other programs. However, the way they are applied is quite unique.
The main focus is made on preserving the original image by providing smart change management.
All usual editors alter the source data with every modification. The image is overwritten every time it is saved. The only chance to retain the original and different stages during its processing, is to create a new file copy after each and every step.
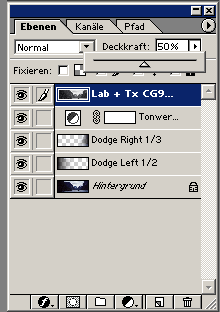 Photoshop layer overview
There is no need for it with Photoshop. Instead, each change can be applied in its own layer. The original doesn't have to be overwritten—it is overlaid.
For example, even converting a colour image to black-and-white can be executed in a very safe manner. All you need to do is create a new channel mixer adjustment layer with the greyscale output. The colour information still remains preserved in the image.
With this "a layer a change" strategy, no modification is destructive. Moreover, it is possible to have many different variant layers, but make only some of them count in the end by hiding any unnecessary ones—just click on the eye icon next to the layer to render it invisible.
In addition, layers can be combined in different ways, or blending modes, and made partially transparent to reduce their overall impact on the final image. Adding a mask can further limit their effect to some image areas only.
The concept allows for endless variations saved within the same image file.
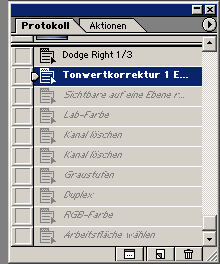 Change history in Photoshop
Through space and time
Additionally, every modification gets stored in the history protocol. The user is able to jump directly to every entry in it, without the necessity to undo the previous steps one by one.
This makes it easy to test some "what if" scenarios. You can try any actions and then either dismiss them altogether, or apply their results in a new layer back in the past.
To make it even more comfortable, different processing states can be saved as snapshots and compared to each other before proceeding with the best one.
With flying colours
Another important "professional" feature of Photoshop is its elaborate colour management.
The application supports different colour profiles and allows converting images from one to another. With its colour proof function, it is possible to estimate how the image will look like in another profile, for example, when printed on different paper types.
More to it
If it weren't enough, Photoshop lets you extend its capabilities by integrating your own and third-party components.
These may include:
- filters,
- plug-ins,
- colour profiles,
- configuration settings,
- derived templates (gradients, patterns, presets, etc.),
- action sets (recorded command sequences to be repeated at will),
- and possibly more—I wouldn't claim knowing every program feature yet.
My configuration
You would be right to expect me working with some odd tools, considered my aged camera and its analogue inside.
Since my old laptop, a 2008 MacBook Pro, quietly died on me at a hotel in Brussels, I work on a refurbished one from 2012, with large memory and a huge SSD. On it, Windows XP runs in a Parallels VM and hosts Adobe Photoshop 6.0.1 with two plug-ins, PhotoKit and PhotoKit Sharpener.
This Windows machine also connects to a Nikon CoolScan V ED film scanner over the NikonScan 4 driver.
Nothing spectacular, save for its peculiarity.
My workflow
Scanning
Everything starts with a scan.
The CoolScan was a dedicated 35mm film scanner able to process strips of film negatives with 2-6 images, or single mounted diapositives.
Mine, of course, still is, but I am pretty sure there are not many of them around.
Since images out of my XPan are 1.8 times as wide as classic 35mm frames, I only have a choice of working with double or triple strips.
Unfortunately, the scanner expects the images to be in the standard format and would only scan something within its dimensions. Here's how a loaded strip looks like in its driver's interface:
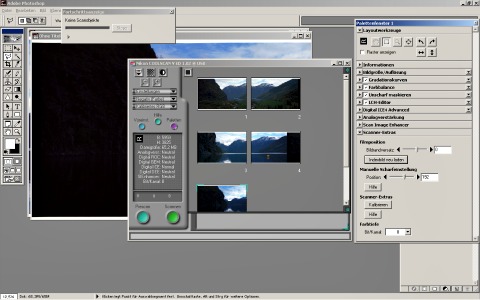 Importing images in Photoshop with NikonScan
Scanning a panoramic image requires pretending it being two different frames, making two scans, and combining their results to a single whole.
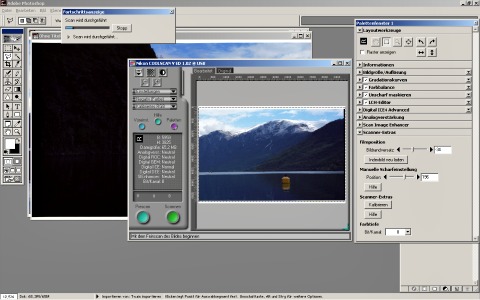 Scanning an image with NikonScan
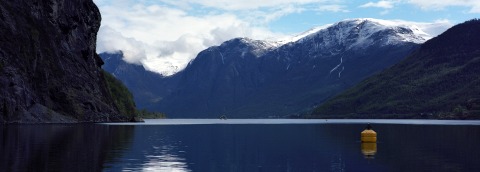
Here, I start with the right half of the middle image because I want the focus to be on the yellow buoy. Then it's the left half's turn with the same settings:
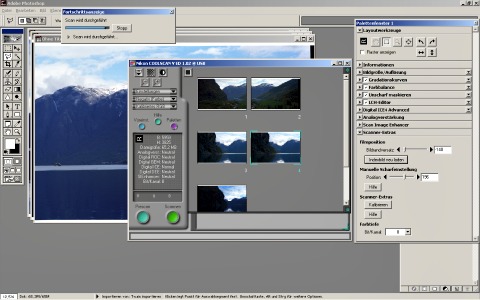 Panoramic images are scanned in 2 steps
(The first half-scan is visible in the background.)
Building it together
To combine both picture parts, one of them is copied and pasted in a layer above the other. Then it has to get aligned with the background scan:
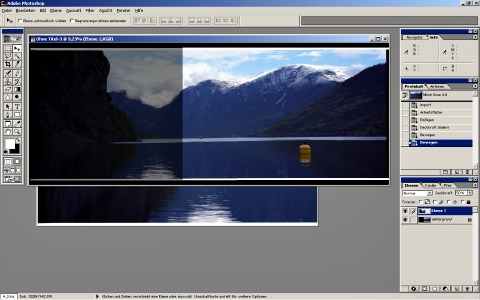 Combining both scans
When everything's in place, the image is flattened to become one. From now on, it is processed as a whole.
Levelling the horizon
The next step is to fix the horizon.
The viewfinder in my camera lacks any level indication when I take an image, so every now and again the horizon ends up sloping. This can be quite a nuisance, especially with panoramic photographs, since correcting it results in significant areas cropped out of the picture.
In this case, only a small intervention is necessary:
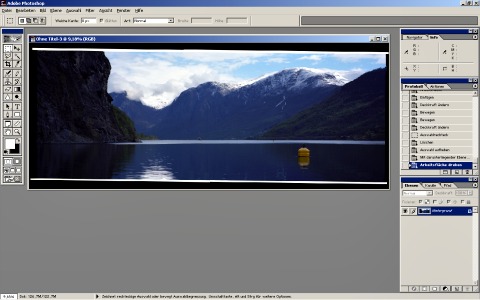 Rotating the canvas
After this, the image gets cropped to its final dimensions. Areas shown in red will be removed:
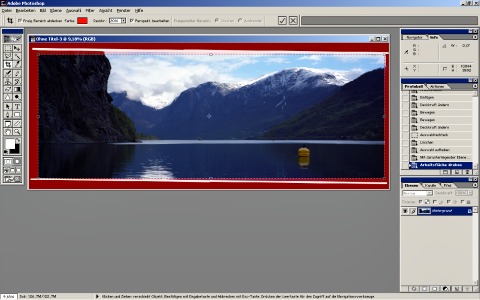 Cropping the image
Now the actual post-processing can take place:
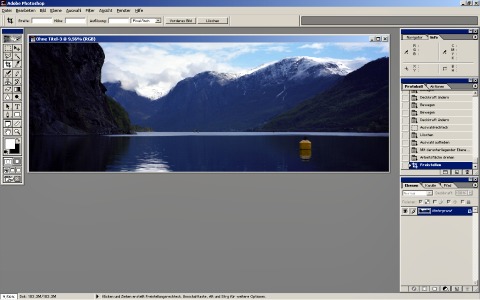 Image ready to editing
Polishing
This usually starts with repairing small blemishes left over from scanning, like scratches, flecks and discolourations.
This can take up quite some time. I scan with 4000 dpi, meaning the normal panoramic frame of 65x24mm ends up as an image with up to 10,100x3,680 pixels. This is *a lot* to examine and improve.
Then it's "standard" levels and curves optimisation, combined with correcting a rather non-standard light drop issue along the edges.
This is related to both frame size and lens construction, and can become noticeable with a wide-angle lens and/or at large apertures.
This image was shot with a 90mm lens, and the effect isn't very prominent. However, I am still unhappy with the dark areas along its sides and apply a dodge effect to both of them:
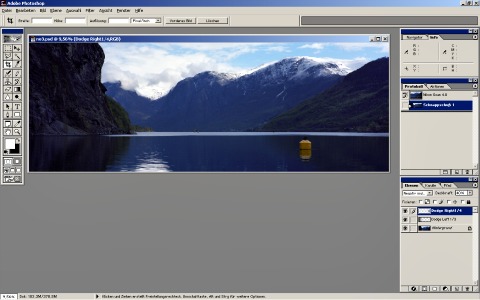 "Sideburns" dodged
This is how the final image looks like. To publish it on the Web, I resample it to 1200x430 pixels and sharpen the result, then save it as JPG.
This is the final resized image before being flattened:
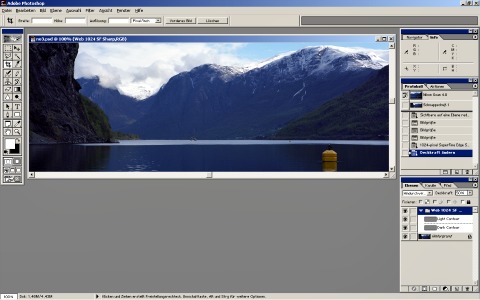 Sharpening the scaled image
And here it is, in all its glory:
Useless knowledge: Photoshop easter eggs
Photoshop is one of the oldest software applications, being around for almost 30 years. Since its very early versions, the program contains some remarkable not-so-hidden features.

One of them is the image of its patron magician, Merlin, presented here in its original size.
The window title is "Merlin lives", and the button reads "Away with you!"
To make it appear, hold the Alt key pressed and click on the triangle in the layer palette, then select Palette options... from the menu.
This is the longest-lived easter egg, in existence since Photoshop 3.0 from 1994 (codename: Tiger Mountain), but absent in CS6 (sequence number 13, codename: Superstition).
For ages, beta test versions of Photoshop have featured a splash screen image different from the retail version. The alternative usually relates to the version codename and remains in the final version as an easter egg.
To reveal it, hold the Ctrl key pressed down (Cmd on a Mac; sometimes a combination of Ctrl+Alt/Cmd+Alt, respectively, will do the trick) and select Help/About Photoshop... with the mouse from the menu.
My version from September 2000 has the following official splash image:

and this one used in beta:

If you sit through the long list of thanks scrolling by, you can see your own name mentioned as "one of our favorite license holders".
Version codenames:
- 2.0 (June 1991): Fast Eddy
- 2.5 (November 1992): Merlin (Mac) / Brimstone (Windows)
- 3.0 (September 1994): Tiger Mountain
- 4.0 (November 1996): Big Electric Cat
- 5.0 (May 1997) and 5.5 (February 1999): Strange Cargo
- 6.0 (September 2000): Venus in Furs
- 7.0 (March 2002): Liquid Sky
- CS (8.0, October 2003): Dark Matter
- CS2 (9.0, April 2005): Space Monkey
- CS3 (10.0, April 2007): Red Pill
- CS4 (11.0, October 2008): Stonehenge
- CS5 (12.0, 12.1, April 2010): White Rabbit
- CS6 (13.0, May 2012): Superstition
The cat was actually present in all beta test splash screens since its namesake version 4.0, like some sort of an easter egg on its own.
I wonder if Creative Cloud (CC) versions continue this tradition.
Tags: #inplainlight #imageworkflow #photoshop
Recommended links
- PhotoKit plug-ins for Photoshop
- Family of plug-ins for Photoshop versions since CS3, created by those involved in Photoshop development, testing, and using.
- Photoshop splash screens
- A collection of retail and test Photoshop splash screens up to CS2 (Space Monkey), from the internet archive.
- The missing beta test splash screens (in German)
- Splash screens for all Beta versions up to CS6 (Superstition).
Previous issue
- 05.17 – The Norway issue
- Follow me along the coast of the happiest country in the world, all the way around the North Cape to the Russian border—and back.
Following issue
- 07.17 – The numbers issue
- As numbers tend to dominate our everyday lives and dictate decisions we make, let's take a look on how they come about and what they really mean.
Other photography tips
- Landscape photography composition tips
- Your mastery of photography composition is what ultimately makes your images. Read here how to excel at it in order to engage your viewers!
- Black & white landscape photography
- Black-and-white photography is very much alive, and landscapes in black and white still look as stunning as in Ansel Adams's day. Be sure to check the article if you'd like to try your hand at this classic and fascinating technique.
- Landscape photography equipment essentials
- Looking for a new camera or another piece of gear? Find answers to your questions, along with some advice and recommendations!
- Fine art photography prints
- And now for something completely different… My thoughts and advice on choosing and using fine art photography prints.
- How to photograph waterfalls
- If your waterfall images are not up to the expectations of your friends, nor to your own satisfaction, try these easy to follow tips to make them shine!
- Marketing fine art photography
- This newsletter issue is about creating your brand and marketing your work, told by those who've been there and done exactly that.
- What is legal to photograph outdoors
- Ever thought about copyright laws having two sides? Your photography can violate them, too. Be sure to know what to photograph, where without getting into trouble.
- How to use Photoshop
- In a dedicated newsletter issue, join me as I show how I use Photoshop to edit my images, and learn some funny facts about the application while at it.
- Wildlife photography tips
- No purchase necessary: Learn how to photograph wildlife for best possible results with your usual equipment.
- Art seascapes
- As November closes in, we take Ishmael's, of Moby Dick, advice and get to sea as soon as we can, led by some highly inspirational examples.
- Winter landscape photography tips
- "Winter landscape" may not sound as exciting as, say, "summer beach", not to everybody, for sure. But if it does to you, there is much to discover outdoors in this time of the year, too. Dress warmly and come on outside!
- Best Adobe Photoshop tips
- We recall some Photoshop basics, like layers, and proceed with more advanced topics, like masks, selective channel editing, converting colour to black and white, and output sharpening.
Unattributed images on this page are sourced from public domain via Pixabay.
Tell me what you think!
Is it useful 👍? Awful 👎? Leave a message! Your comments help make this site better (and give me a kick—one way or another).
Popular articles
-
A kind of magic
If a digital picture has to be seen in the real world, printed on a real medium and displayed in a real showcase, its transition from RAW to real is better done in an old school image editor. Enter A…
-
A duck for a dog
If you got your own place on the Internet, helping your visitors find what they are looking for is a great way to engage them and keep them staying a bit longer. A custom site search can achieve just …
-
"Might as well have the best"
Aiming for better images? Think better lenses! This is your most important piece of gear, so you better get it sorted out. — Need some advice?

 Become a patron for